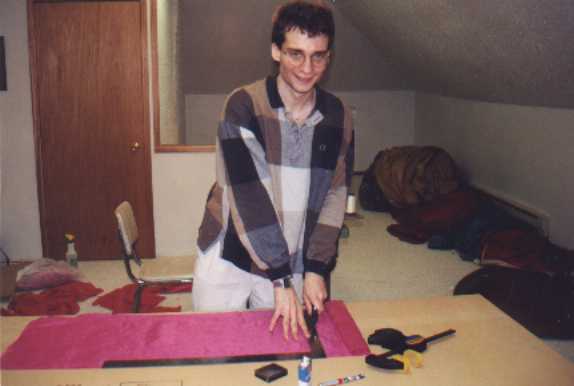
Below is a picture of me cutting fabric to practice sewing on. Bill Clemons had a
lot of extra fabric from when he and his wife built there balloon. They were generous
enough give me a bag of scraps to practice on. In the background to the right is my
old balloon that I brought up to look at how it was constructed.
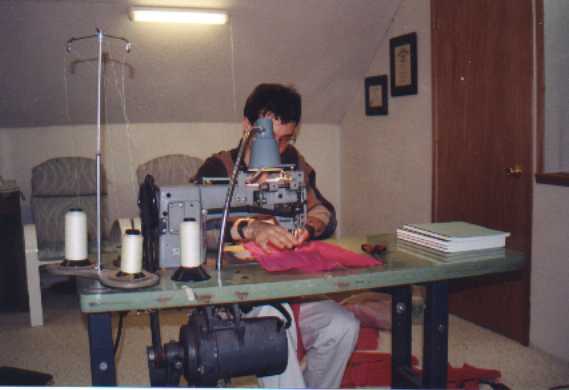
I spent quite a few weeks just learning how to use the sewing machine, and making
practice seams. I had never sewn before, so I had a lot to learn.
This is me running a practice seam through the sewing machine. I found it much
more difficult to sew while practicing because the fabric scraps were all wrinkled from
years of being stuffed in a garbage bag.
I use the following steps in folding a flat fell seam. Robert LeDoux was the one
who told me how to do it this way. Originally I had planned on a method that would have
taken a lot more time.
- Use one pin at the start of the seam to hold your fabric in a flat-fell seam.
- Put another pin about 4 inches down on the fabric.
- Put the cloth under the foot of the sewing machine.
- Bring down the needles into the fabric of the cloth.
- Remove the first pin from the fabric, raising the foot a bit if necessary.
- Sew anywhere from one to three inches. Grab the thread ends and pull them away
from you while you start the seam. This will keep the fabric moving through and help
prevent the thread from knotting. If the fabric isn't moving, the thread is likely
knotting underneath. If this happens, stop, rip out the thread and try again.
- Remove the second pin.
- Near your chest, fold the fabric in a flat fell seam and hold it with one had. The
rest of the fabric should mostly fold itself. By using your other hand you can make sure
the fabric folds all the way.
- Sew this section of seam and repeat steps 8 and 9 until you are done.
Anytime you have to break the thread, overlap the seam by at least six inches. This
gives you a wide safety margin. You will have to break the thread for the following
reasons:
 | The thread, or part of the thread breaks. If one strand breaks it will bunch up
over the needle. Make sure to check for this every time you stop the machine. |
| The knot in the stitch appears above or below the fabric for more than a few inches. If
this happens, the stitch is weaker and is unlikely to "lock" if a thread breaks.
That is, the stitch will unravel. |
| You run out of thread in one of the lower bobbins. I recommend replacing them at the
same time. |
| You allow fabric to fold back under the foot of the machine, sewing it into the seam as
well. Here you have to rip out this portion and redo it. |
| You allow fabric to get caught between the needle and the top of the foot. This is
a pain! I've had this happen twice. The top fabric gets pushed through the hole in the
foot and is sewn into the seam. So you have a 'loop' in the fabric that is hard to cut
loose. The second time this happened to me I had ended up with a 3 mm hole I had to
sew a patch for. If you only sew a couple feet at a time this shouldn't happen to
you. |
I would recommend sewing the bottom panels together first. These take less load than
the top panels. So by the time you sew the top panels, you will have more practice.
Something I learned along the way: It is very important to change needles often. In
fact, I'd recommend buying 100 needles before you start building your balloon. Use them
like you will run out by the time you finish. If the machine is properly tensioned, timed,
and has good needles, you should not ever have a broken thread strand.
